
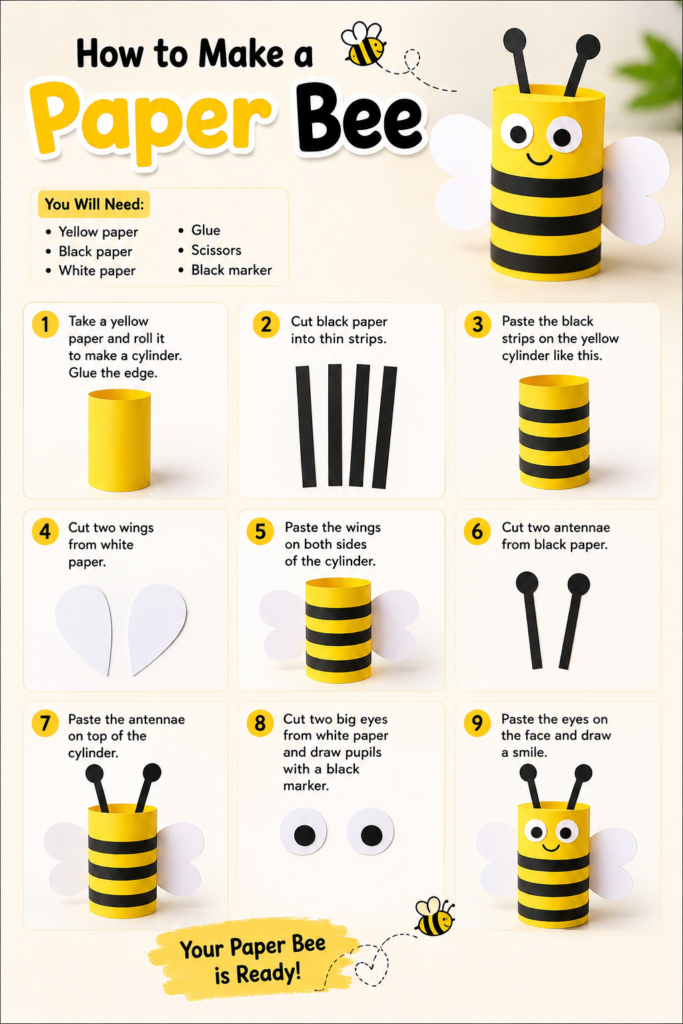
Create a Cute and Buzzing Paper Bee With Just a Few Simple Craft Supplies
Looking for a fun, easy, and creative activity for kids? Making a cute paper bee is a wonderful way to spend an afternoon crafting with your family. With just a few simple supplies, you can turn ordinary paper into an adorable little bee with bright yellow stripes, tiny wings, and a friendly smile.
This easy paper bee craft is perfect for preschoolers, elementary school students, parents, teachers, and anyone who enjoys DIY projects. It is also a great activity for spring, summer, insect-themed lessons, Earth Day celebrations, or classroom art projects.
The best part is that you do not need expensive materials or special crafting skills. Follow these simple instructions to create your own buzzing paper bee!
Why Make a Paper Bee Craft?
Paper crafts encourage children to explore their creativity while developing important skills. Making a paper bee helps kids practice cutting, folding, gluing, and following directions.
This activity also provides an opportunity to learn about bees and their important role in nature. Children can discover how bees help flowers grow by transferring pollen from one flower to another.
You can make one bee as a simple decoration or create an entire group of colorful paper bees for a classroom display. Add paper flowers, green leaves, and a blue sky background to build a cheerful garden scene.
Materials You Will Need
Before starting your project, gather these easy-to-find craft supplies:
- Yellow construction paper
- Black construction paper
- White paper for the wings
- Child-safe scissors
- Glue stick or craft glue
- Black marker
- Pencil
- Googly eyes (optional)
- Pink or red paper for the cheeks (optional)
You can use colored cardstock instead of construction paper if you want your bee to be a little sturdier. Recycled paper and leftover craft materials are also great options.
For younger children, an adult should handle any cutting that requires sharp scissors.
Step-by-Step Instructions to Make a Cute Paper Bee
Step 1: Create the Bee’s Body
Start by taking a sheet of yellow construction paper. Use a pencil to draw a large oval shape for the bee’s body.
The oval should be wider in the middle and slightly rounded at both ends. Carefully cut out the shape with scissors.
If you are crafting with younger children, you can draw the oval in advance so they can focus on decorating their bee.
Step 2: Add Black Stripes
Cut two or three thin strips from black construction paper. Apply glue to the strips and attach them across the yellow oval.
Space the stripes evenly to give your paper bee its classic black-and-yellow appearance.
Trim any extra paper extending beyond the edges of the body. You can also use a black marker to draw the stripes if you prefer a simpler design.
Step 3: Make the Wings
Take a piece of white paper and draw two oval or teardrop-shaped wings. Cut them out carefully.
For a more decorative look, use pale blue paper or lightly color the wings with a blue or silver pencil.
Glue the wings near the top of the bee’s body. Place them slightly behind the yellow oval so they appear to extend outward.
You can overlap the wings a little to make your bee look as though it is ready to fly.
Step 4: Give Your Bee a Friendly Face
Now it is time to add some personality!
Draw two small eyes near the front of the bee’s body using a black marker, or attach googly eyes for a playful effect.
Add a curved smile beneath the eyes. You can also cut tiny circles from pink or red paper and glue them onto the cheeks.
Want to make your bee extra cute? Draw little eyebrows, eyelashes, or a surprised expression. Every bee can have a different personality!
Step 5: Add Antennae
Cut two thin strips of black paper for the antennae.
Glue them to the top of the bee’s head. Bend the strips slightly or curl the ends around a pencil to create a fun, curved appearance.
For a finishing touch, attach small black paper circles to the tips of the antennae.
Step 6: Give Your Bee a Stinger
Cut a small triangle from black paper and glue it to the back end of the bee’s body.
Make the triangle small and neat so it complements the rest of the design. Your cute paper bee is now complete!
Fun Ways to Decorate Your Paper Bee
Once you have finished the basic bee, try a few creative variations.
Make a flying bee: Attach a narrow paper strip or string to the back so you can hang the bee from the ceiling or a classroom display.
Create a 3D bee: Fold the wings slightly upward to give them a raised appearance. You can also layer two yellow oval shapes for a fuller body.
Build a bee garden: Make several paper bees and surround them with colorful paper flowers, leaves, and clouds.
Design a bee bookmark: Make a smaller bee and attach it to a long strip of cardstock. Decorate the strip with flowers and stripes.
Add a craft stick: Glue your bee onto a craft stick to create a simple puppet for storytelling and pretend play.
Educational Benefits for Kids
This simple project combines art, creativity, and learning. Children practice fine motor skills as they cut, fold, draw, and glue different shapes.
Teachers can also use the craft to introduce basic science concepts. Explain that bees are pollinators and that many plants depend on pollination to produce fruits and seeds.
Ask children questions such as, “What colors do bees have?” or “Why are bees important to flowers?” These conversations make the activity both entertaining and educational.
Conclusion
Creating a cute and buzzing paper bee is an easy, affordable craft that children and adults can enjoy together. With yellow and black paper, a little glue, and a few simple decorations, you can make an adorable bee in just a short time.
Whether you use your finished bee for classroom decorations, spring crafts, handmade cards, or imaginative play, this project offers plenty of opportunities to experiment with colors and designs.
Gather your supplies, let your creativity take flight, and enjoy making your own cheerful paper bee.
Happy crafting!
Read more – Paper animals with easy step-by-step